This is the first window that will appear after you install Auto Power-on & Shutdown Software on your Computer. This program is a shareware. You can try this software free for 30 days after which you have to purchase a licence or uninstall it from your Computer. To start using the software, just click on “Evaluate” button.
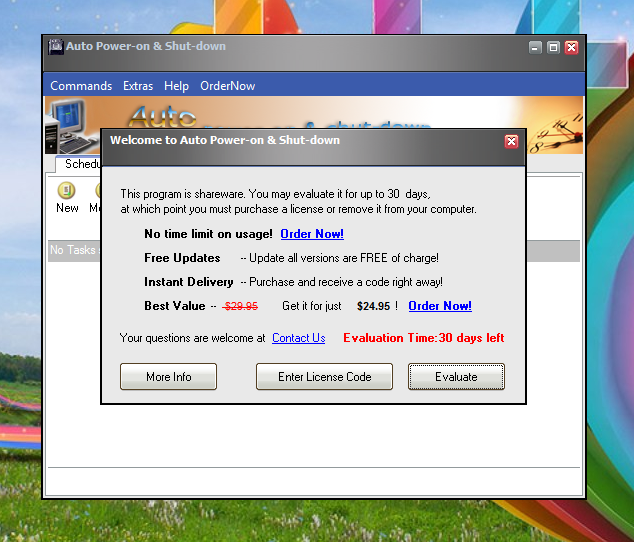
First start-up Window of Auto Power-on and Shutdown
This is the Main Window of Auto Power-on & Shutdown software with Commands, Extras, Help and Order now menu items.
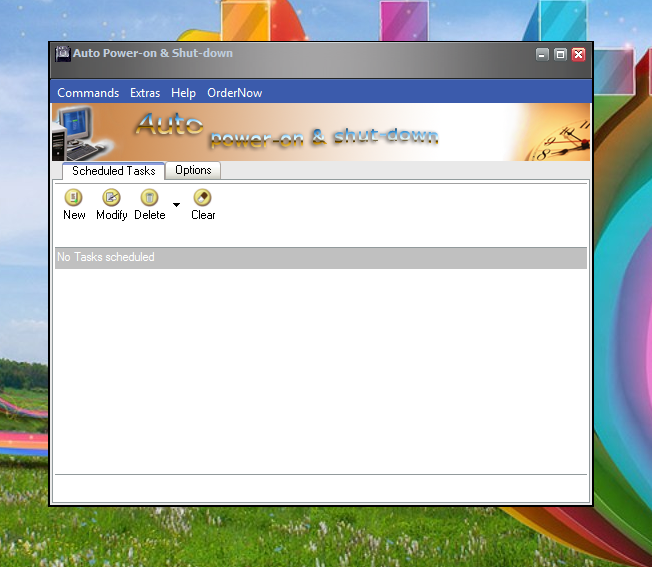
Main Window of Auto Power-on and Shutdown
The Commands Menu of Auto Power-on & Shutdown offering Shutdown, Restart, Log off, Standby, Hibernate, Lock Session and Close Monitor Options.

Commands Menu of Auto Power-on and Shutdown
Below is the ‘Extras’ menu with Auto Shutdown, Atomic Clock, Power Management, Import tasks, Export tasks and Uninstall options.
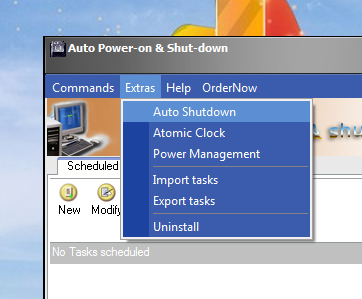
Extras menu of Auto Power-on and Shutdown
You can go to the Help menu to view User Manual to know more about how to use this Software, Send Feedback, go to the Software Homepage, or to order full version of this Software.
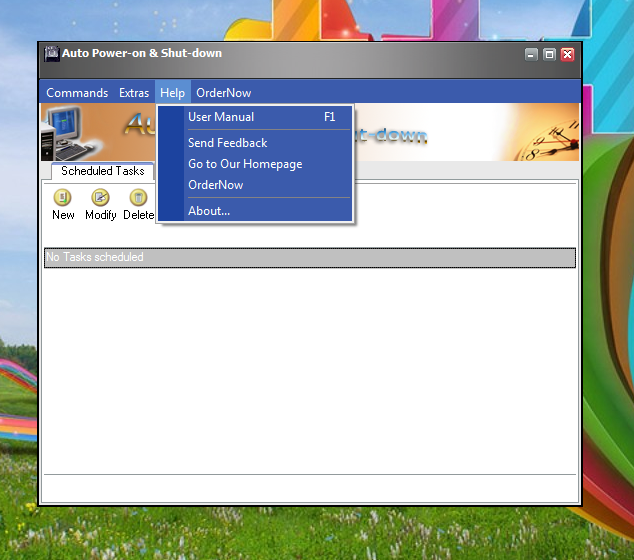
Help menu of Auto Power-on and Shut down
Auto Shutdown Window under Extras menu. Here you can set a timer for your Computer to shutdown automatically after specified period of time.
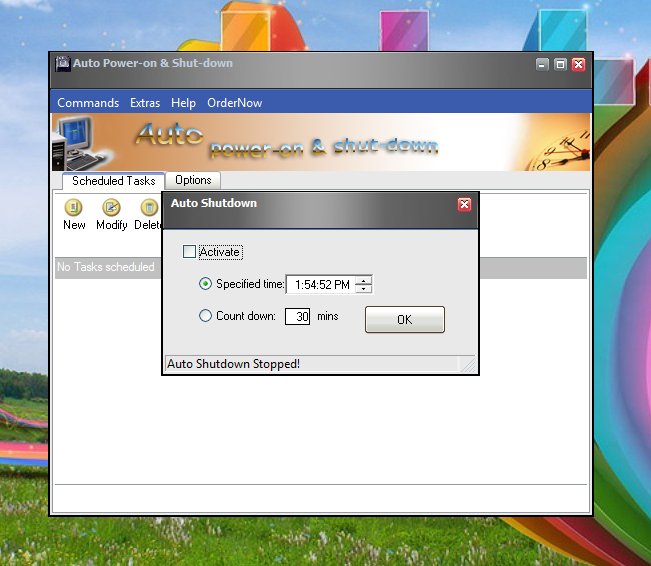
Auto Shutdown Window under Extras menu of Auto Power-on and Shutdown
The following Window appears when you click on Atomic Clock in the drop down menu of Extras. Here you can let the software adjust the Date and Time automatically.
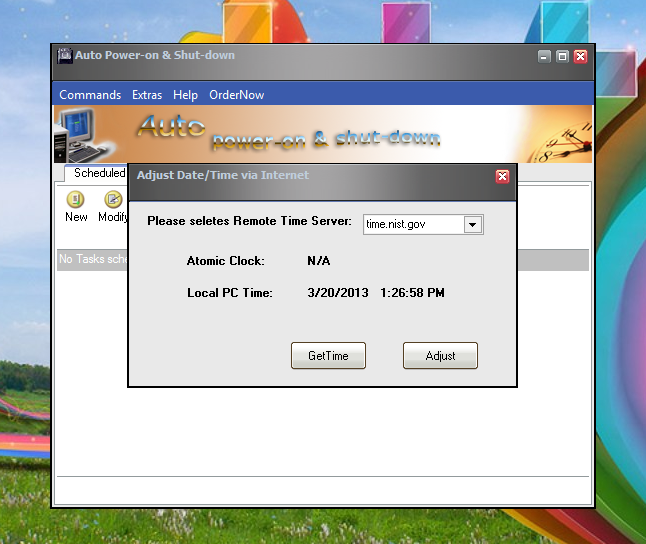
Atomic Clock Window under Extras menu of Auto Power-on and Shutdown
Below is the options section of Auto Power-on and Shutdown.
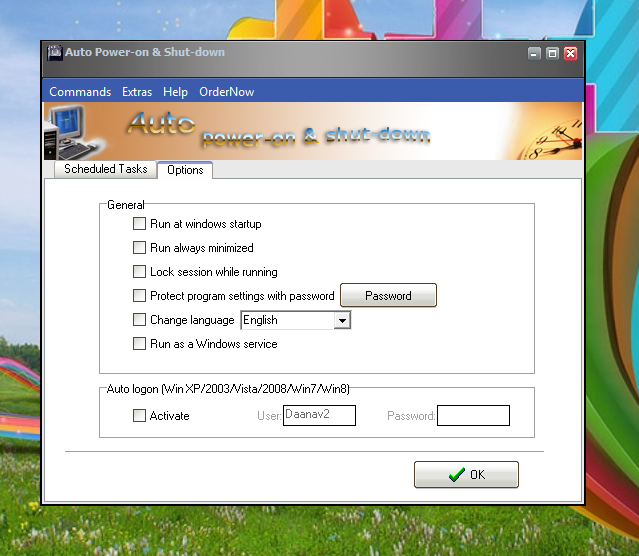
Options Window of Auto Power-on and Shutdown Software
In the options section, there is Change language option in which there are many languages listed. You may select your suitable language to change the overall language of the Software.
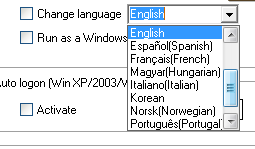
Auto Power-on and Shutdown Software supports many more languages
To create a Task to Shutdown the Computer automatically, just click on new button under Scheduled tasks on main Window. The New Scheduled task opens with options like Daily, Once, Monthly, Annually and Weekly.
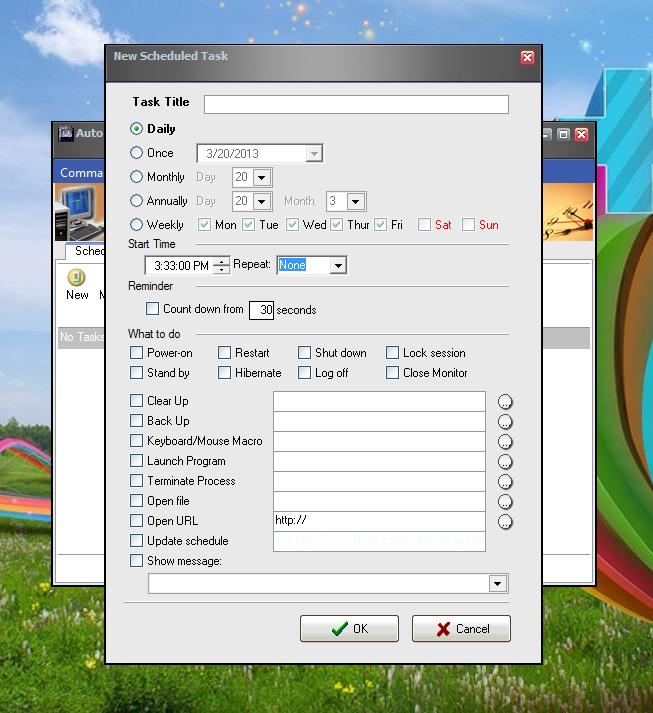
New Schedule Task Window
In the New task window there is a ‘What to do’ section. Here you can specify an action when Auto shutdown event is started. If you do not want to Turn off your Computer and instead want to Restart or log off, you can select any one of the options from here.
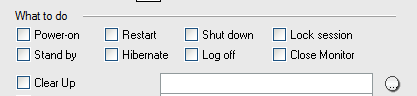
What to do section in New task window
Under What to do section there is “Clear up” option. With this you can choose to Clear up Recycle bin, Temporary files of Windows, Browser history, and Cookies of Internet Explorer while turning off Windows as shown below.
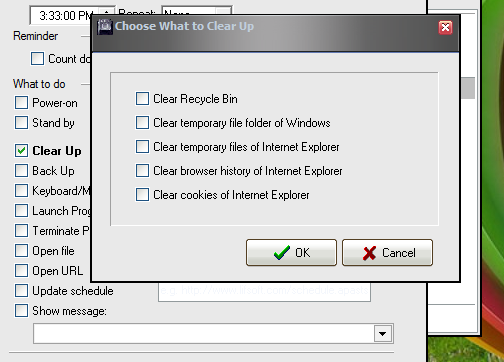
Clear up option under ‘What to do’ section
There is one more option in this Window known as Keyboard and Mouse Macro. with this you can Record your Keyboard and Mouse as you move it and the recorded pattern will automatically start playing during the last few seconds of automatic shutdown
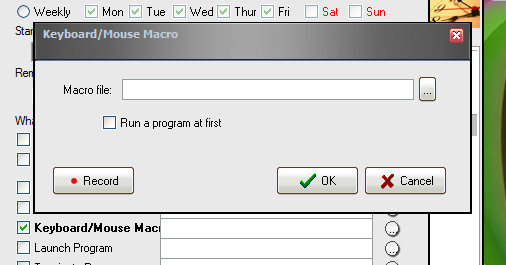
Keyboard-Mouse Macro window
Pressing the Record button will start recording the mouse movements an keyboard clicks. alternatively you may select a previously saved Macro file if you do not wish to record now. After pressing record, the following window will appear as a confirmation to record your keyboard and Mouse as Macro.
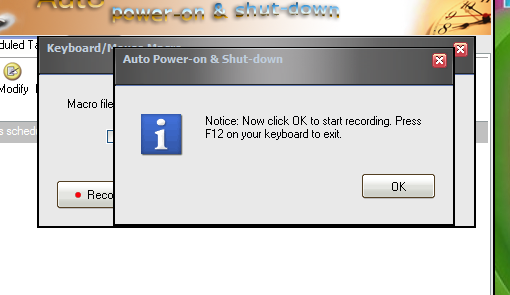
Notice window appears when Record button is pressed in Keyboard-Mouse Macro window
After clicking OK it will show you one more confirmation window asking your permission to start the recording

Warning window asking permissions to start recording your keyboard
Click Yes and the Software will start recording the keyboard and mouse. To stop the recording, simply press F12 key on the keyboard, and following window will appear asking a destination to save your Macro file.
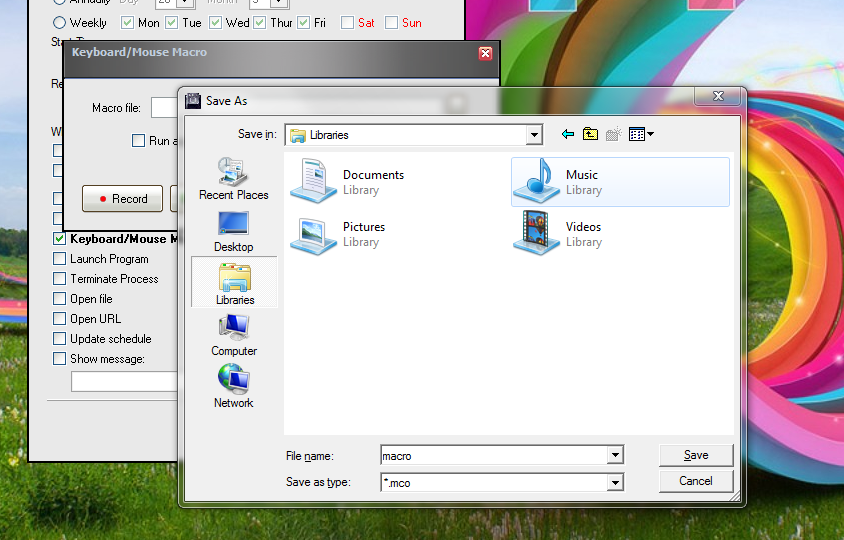
Save as window to save the macro file on the local hard drive
After Macro there is Launch program option where you can set a program to launch automatically when the shutdown event has started.
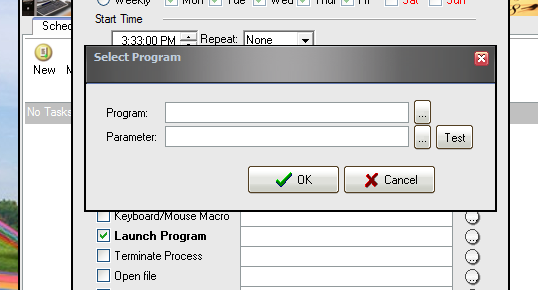
Select program window opened after selecting Launch program
Set a custom message which will appear when the shutdown event has started. you may select a pre-set message, or u can can type your own message.
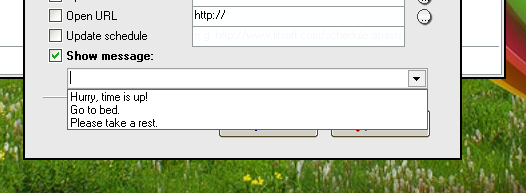
Show custom message when the Task is run
After setting up the Task, click ‘ok’ and the Task will appear on the Main Window as shown in the below screenshot
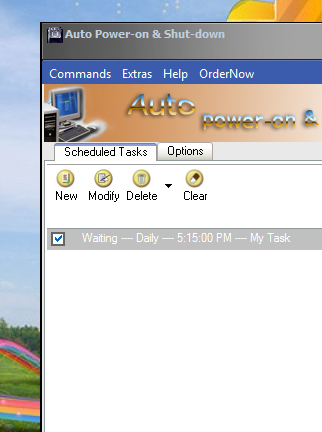
Added Tasks shows under Scheduled tasks window. The selected tasks can be modified and deleted.
You can password protect the software settings by clicking on password in options window
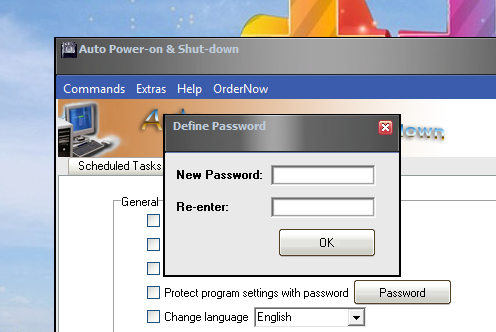
Enter Password to protect the program settings